Finished Spoons!
Used for Place Settings!
I saw
this idea on Pinterest and decided to make it for Thanksgiving, not realizing how hard it would be! I ordered the stamping set from the recommended place on the tutorial, however I would not order from
them again.
I was overcharged for shipping (items shipped in a flat rate box) and the heavy items were only packaged with (free) cut up USPS boxes, no bubble wrap or protective packaging of any kind. Everything arrived unharmed except for the plastic case the stamps were housed in, which was badly damaged.
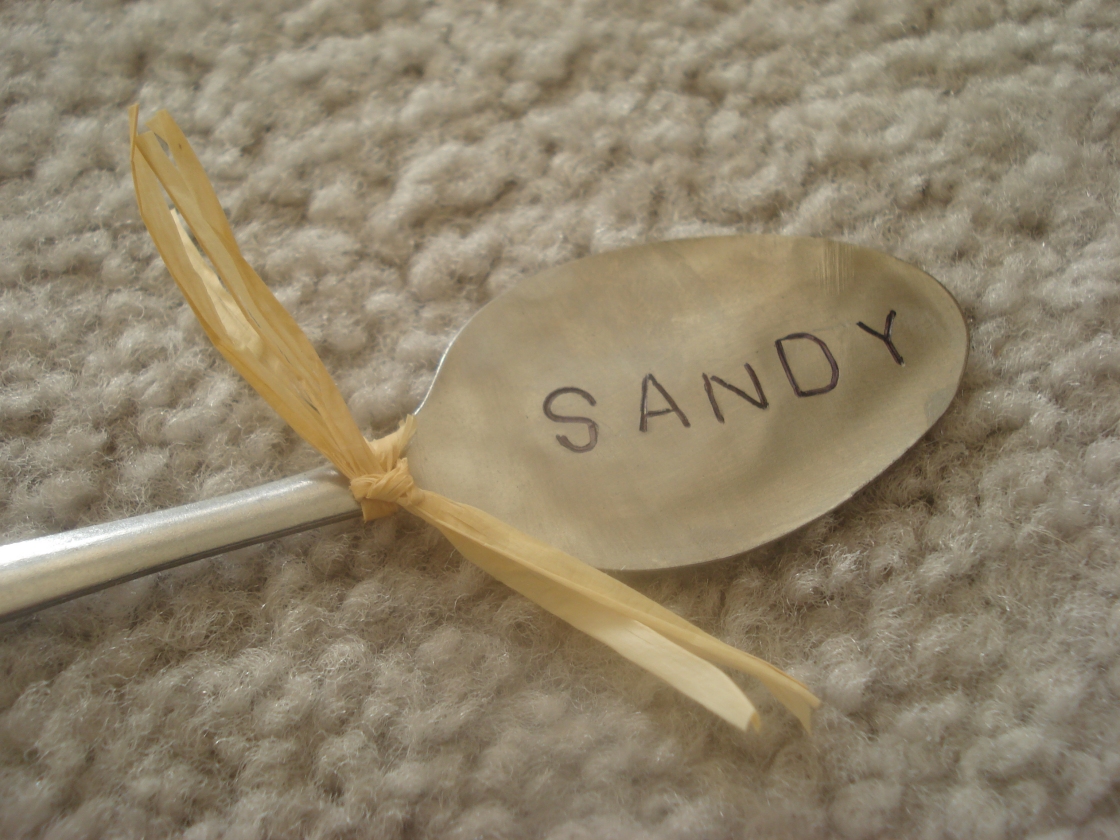
I found the exact same set at my local Harbor Freight for half price (on sale), normally $2.00 less for regular price AND no shipping costs. The seller also claims that the stamps would last through 9000 stampings, but I only got about 5 stamps out of the letter "D".
You can see that the "D" is all smashed on one side and will not leave a good impression. To the sellers credit, he told me to return the letter and he'd send me a new one.
Here are some tips that I hope will help those who might have this on their "to do" list.
1. Use CHEAP/NOT QUALITY spoons. I went for pretty first, buying spoons at my local thrift store. Even though they were cheap in price, they were good quality spoons. Surprisingly, even nice things get donated.
We went with .50 spoons from target, but they wouldn't flatten. Who makes a quality spoon for .50?!? We finally went with .10 spoons from our local Restaurant Supply store. If the spoon bends easily you're in good shape.
2. Make sure you have extra spoons. I ended up with 16 finished names, and used 36 spoons!
(yes, I messed up 20 spoons) Luckily I had bought 48 spoons.
3. Have the right supplies. Quality Stamping Set, Hammer, Sledge Hammer, Metal Block, Tape and Cheap Spoons
4. Use a metal block and small sledgehammer for flatting your spoons.
Here's the side by side of a regular spoon and a flatten spoon.
Here's what happens when you use the concrete front porch steps to flatten spoons
(instead of a metal block)
The spoon gets all scratched up too.
5. Use a Metal Block to stamp your spoons. Wood and other materials have too much "give" and won't make a good impression.
6. Use tape to hold your block and spoon down.
Every time the hammer hit the stamp, my metal block would "jump" and move the stamp slightly, resulting in this effect.
7. Make sure you are stamping on the correct side. Since your spoon is flat, it's easy to make that mistake. Note spoon below.
8. Test out your letters on a "practice spoon". My J would get a great impression on the bottom, but not on the top. The spoon above became one of my (many) practice spoons...
9. Make sure your stamp is facing the correct way. The "S" below is upside down, but since it's an "S", it didn't make a huge difference.
10. You can use a thin sharpie to accent the letters. You can also use the sharpie to fill in where you might not have gotten a good enough impression. (like the "A" and "N" in the spoon above)
Without Sharpie...
With Sharpie.
11. Space out your stamping. I had 16 names to do and with my mistakes, it ended up being a lot more. Had I more time I would do about 5 a day. My hand was red and shaking after about 5, so I took about an hour break in between stampings.
12. It won't be perfect, and be ok with that (something I'm not too good at). After all, the imperfections are part of the charm and character of the spoon.
I also made a "Baby" one since one of the moms is pregnant :)
Everyone LOVED the spoons which made all the struggles worth every second!