Tuesday, July 12, 2011

Job Jars Redo

 "New" Job Jars

I made some job jars a few months ago.  I had one color for weekly jobs and another color for monthly jars.  Each day the kids would pick a weekly job to do and then on Saturday we would pick a monthly job to do. The problem that we had was children selectively picking which jobs they wanted to do, or forgetting the "normal" things they need to do daily like put away clothes or pickup toys.  So I came up with this redo.  

Each child still has their own jar, but these are the "new" sticks.  The sticks in each jar are daily jobs and must be completed before any playtime.  Doing all the items in the jar should take more than an hour, so doing them before playtime shouldn't be a big deal. The "Mom's Choice" stick is an idea from another blog.  The "Mom's Choice" might be a monthly job to do (green sticks) or to put away the recycles or take out the trash.  Some days it might even be a fun treat instead of a job.

These are for Ernest...

On the back of the "Job" stick is a list of his jobs to do.  Since he is here for only part of the week, he only has 3 jobs listed.

Here are Hannah's jobs

Here are her three jobs to do on the same days that Ernest does his jobs.  On the days that Ernest is not here, she will do his "Swish and Swipe" job.

I don't have a jar for my "jobs" (I think it would be too full!) I just listed them in my Google Calendar. I (and the kids) will do one house cleaning job a day, this way the entire house gets cleaned each week without having to dedicate an entire day to cleaning.

We still have the monthly jobs to do.  We will still pick one of these each weekend (this will be a "Mom's Choice") and we'll work on the job together.  This way the jobs that don't need to get done every week, will still get done in a timely manner.

I decided to keep them on my computer desk so that I see them every day and we won't forget to do them!!

Monday, July 4, 2011

4th of July Shirt

2nd Attempt (it's a keeper!)

I made a 4th of July shirt last year from the Makes and Takes tutorial.  UNFORTUNATELY, I did not test the red t-shirt fabric first, and when I wash it, the red dye transferred all over the shirt!

This year I wanted to make the "girl" shirt again, but had SO much trouble with the gathering and sewing the ruffles onto the knit shirt, that I finally gave up and made the "boy" design.

The button stars are perfect for the shirt.

Even though it's the "boy" design, Hannah loves it!

Sunday, July 3, 2011

Recycle Bag Redo

"New" Recycle Bags

I made a set of Reusable Recycle Bags a while back and
 washed one of them soon after and it shrunk... BADLY!
I put off washing the rest of the bags as long as I could! 
Finally I could wait no longer and washed them all.

Due to the 2" shrinkage, the (once cute) arrows looked horrible.
I removed all the "old" arrows..

...bought some cute fabric from Brown Paper Packages

...and used that to create new arrows.

I love the fabric that says "love a tree", "good earth", etc.

I did add a couple special items to two of the bags.
This little "recycle" tag

and the little birdie perched on top one of the arrows.

I love how they turned out and that I can use them again!

Tuesday, April 5, 2011

Flannel Rag Quilt for Baby

 Finished Rag Quilt

While my sister-in-law Julie was visiting she requested that we make a baby blanket for her baby due in September.  We used the tutorial from Just Enough Style for the blanket.  

We picked gender neutral colors because she doesn't know if she's having a boy or a girl.
I think it turned out great!

Thursday, March 17, 2011

Pinch Proof T-Shirt

Pinch Proof for St. Patrick's Day!

I followed the tutorial from Skip to My Lou to make this t-shirt for Hannah.

Wednesday, March 16, 2011

Retro Dishes

I bought these dishes from Savers. 
They were about $2.00 each set, for a grand total of $8.58.

I love them!

Jeff says they're Grandma dishes...

I say they're retro.

Monday, March 7, 2011

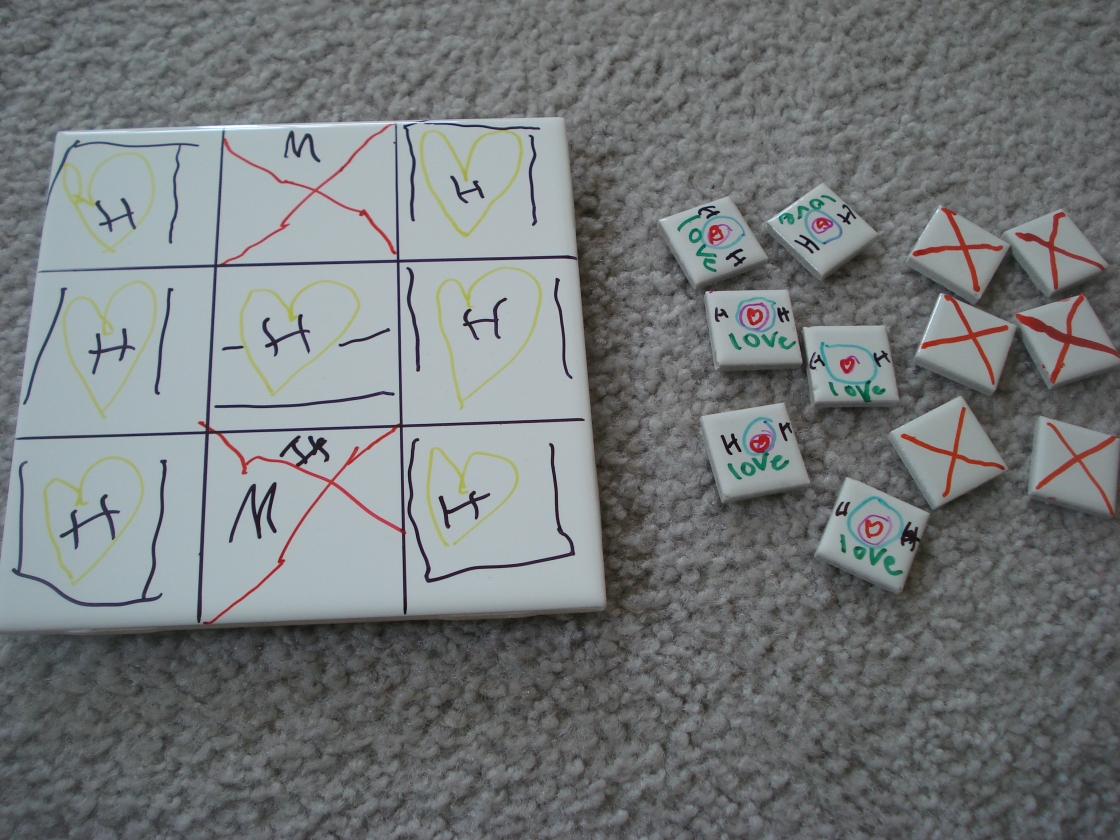
Tile - Tic Tac Toe

I saw this idea at Lowes and knew Hannah would love it. When her friend Max came over they did this craft together.

Hannah couldn't find any "natural" tiles that she liked to use for this project, so we decided to go with a 6x6 white tile.  The black and white mosaic piece was on clearance and because there so many missing and broken pieces, they gave it to me for half off, so total cost for the tiles was $1.78

I had some leftover sticky back felt....

that we cut up and put on the back of the tile.  
This was it won't scratch any surface you play on.

I drew the black straight lines on the white 6x6 tile with a black sharpie and a ruler.  
I let the kids use all the other colors for decorating.

Max chose a simple design

Hannah chose a more interesting intricate design.

Her board

Her tiles

The kids had a great time with this and especially loved drawing with sharpies!