Showing posts with label Crafts. Show all posts

Thursday, May 3, 2012

Growth Chart

Finished Growth Chart

 Following this tutorial from Whipperberry, I made a few portable growth chart.  

I bought all the rolls of Jute Webbing I could find at my local Super Wal-Mart.  Each roll is about 6', so it's perfect for a growth chart.

Here's the roll before I started.

With a ruler I marked off each inch with a sharpie.  Using a stencil, I made numbers for each foot mark.  Whipperberry put numbers every other inch, but this way was easier looked less cluttered.

With WordArt (in Microsoft Word) I made a template for the name.  I used an X-Acto knife to cut away the letters.  

I colored in the first letter with the sharpie...

and then pulled it back to see if it worked.

I finished the rest of the letters and then went over them again to make sure they were dark enough and to fill in any spots I missed.

Goudy Old Style is the font.

I used a grommet for the hanger at the top...

which worked great!  

I love how easy and cheap it is, so that each child can have their own.  

Friday, December 30, 2011

Crayon Roll for Twist-up Crayons

Mushroom and Fairy Crayon Roll

Since Hannah has upgraded from "regular" crayons to twist up crayons, I decided to make her a new crayon roll.  I used the tutorial from Skip to my Lou, but changed the dimensions to fit the twist up crayons.

The pockets for each crayon are 3/4" wide

I also added two additional pockets, one at 3/4" for a pencil, and this one at 1" for a twist up eraser.
I used a 1/4" seam allowance on the entire piece.  

Outer Piece & Lining - 11.25" long and 8" tall
Inner Pocket - 11.25" long and 10" tall (folded in half so it measures 11.25" long and 5" tall
20" piece of cording and a cord stop

If you are just making one for 12 twist up crayons without the extra slots then it would measure 9.5" long (instead of 11.25" long)

Hannah's is SO into mushrooms right now this this fabric worked perfect!

The little fairies are cute too.

All rolled up which fits nicely into my purse, for drawing at restaurants.

The cord stop keeps everything nice and tight so no crayons slip out.

Friday, November 18, 2011

T-Shirts for Max

Finished Shirts!

I made these back in April for a friend of my daughters. He did get them on his birthday... I just haven't blog it until now!

I searched the internet for some graphics that would work on shirts.
 

I used freezer paper and then painted the design with craft paint.  


I think the shirts turned out looking just like the originals, although it was harder than I anticipated.


Of course it would have been easier to just give him 3 store bought shirts, but I like the idea that he now has 3 one of a kind items!

Sunday, November 6, 2011

Edison Quotes

Finished Art

I made these three art pieces for my Dad's birthday which was in June.  He received them in August when we went to visit, but I'm just blogging about it now.  

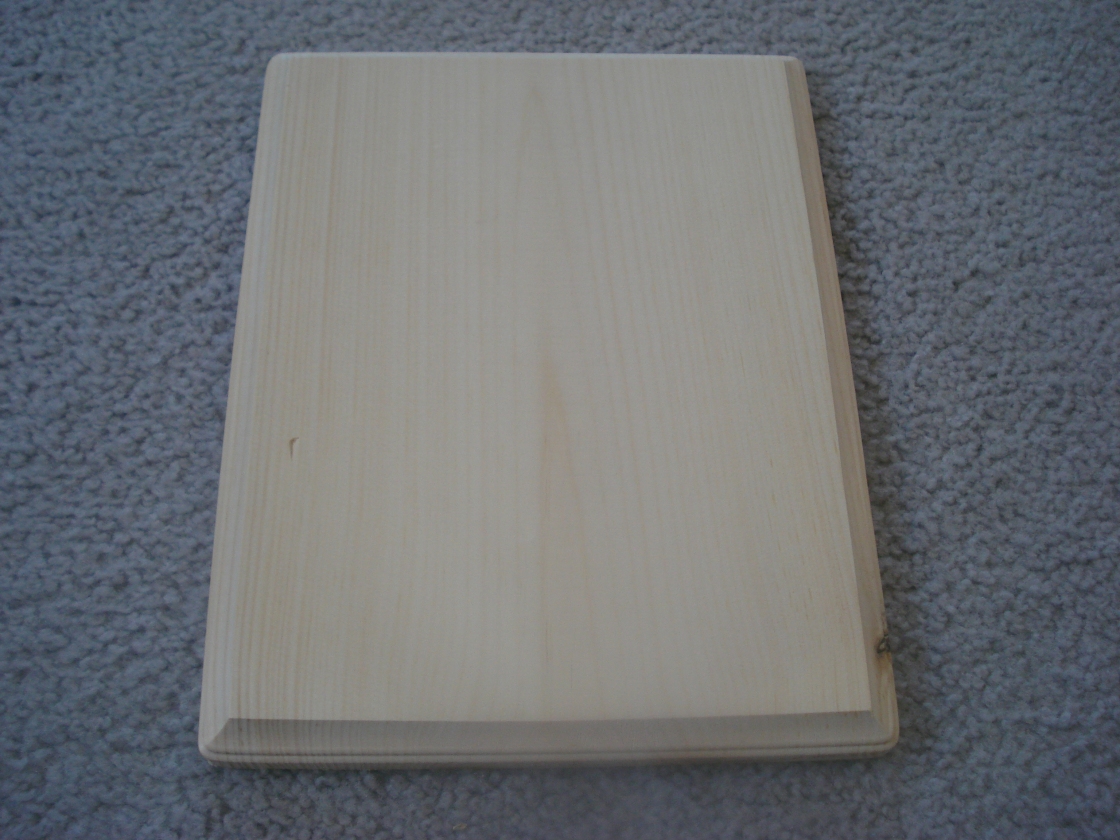
I originally wanted to buy this from etsy, but the $70.00 price tag (plus shipping to Hawaii!) wouldn't work for me.  So I settled and bought this wooden board from Hobby Lobby to use for my quote.  

Each board measured approximately 8x10.  Knowing I was going to put this in a suitcase to take to Hawaii, I didn't want to get much bigger than this.  Because the 8x10 was a lot smaller than the original piece I wanted to buy, I decided that one wasn't enough and I bought 3 boards for 3 different quotes.

There were about $2.00 each, had wonderful edges AND the holes in the back for hanging!

I painted each board black.

I used the Outdoor Opaque, since he lives in such a wet climate, I wanted to make sure the boards were durable.

I used the silhouette, and cut out my 3 quotes with cream vinyl.
(The vinyl is not smeared or fuzzy, it's just my camera)

I was a little sad, that the vinyl didn't stick like I thought it would.  I don't know if it was the paint I used or the vinyl itself.  My dad said he would spray each board with a clear coat of some kind... something I didn't want to do before packing the boards in the suitcase.  

Quote 2

Quote 3: The original inspiration

My dad LOVED the gift, and each quote had a special meaning for him.

Sunday, September 25, 2011

31

Finished Pumpkin

I saw this idea from Family Circle October 2011 issue.  I LOVED the white 31 pumpkin and downloaded the template for it from the Family Circle website.

I bought an off-white "Funkin" (fake pumpkin) from my local craft store.

I didn't have the specialty rub-on paper to make the pumpkin in an easy one step process, so I created a cheaper 3 step process...

1.  I printed out the 31 on my ink jet printer and was able to rub enough of the ink on so that I could see the number on the pumpkin.  I used a Popsicle stick for the rubbing.

2.  I tested my sharpie on the bottom of the pumpkin to check for any bleeding effects.  The sharpie worked great with no bleeding, so I used the thin sharpie to outline my rub-on.

3.  Using my thicker sharpie, I filled in the number 31.  I am loving the end result!

Bring on Halloween! 

Monday, August 29, 2011

Appliqued Shirts

Finished Shirts!

While browsing my favorite blogs, I found this post with a lot of really cute appliqued shirts.  I made these in July before my trip to Hawaii.  They are for my sister's baby and I wanted to take them with me, so I wouldn't have to ship them.  I knew the first one would have an elephant on it because my sister loves elephants.  

I found this clipart of an elephant


and changed the trunk a bit.

Into this.  
(I wanted to add a little heart above the trunk and thought this design would work great.)

I cut the entire thing out of blank paper before cutting it out of fabric.  This would give me a better idea of how it would look without some of the details on the internet version.  Sometimes I have a hard time visualizing the end product so this helps.

I used Wonder Under to attach it to the shirt and then zigzaged around the edges.

I added a button eye.

and here's the super cute tail in the back!

I love birds, and since I'm not an artist, I had to scour the internet for a clipart that would work. 

I found these cuties.

I enlarged the green bird and printed it out.

Here's the finished bird!

Of course when I gave these to my sister, I received lots of love, which is another benefit of delivering them in person!