This summer we spent a week at my Aunt's farm in Minnesota. I was enthralled with farm life and took tons of pictures of everything around me. I decided to make her a picture collage of my favorite photos from her farm. Brooke gave the pictures a vintage look and feel and Bridget gave me the idea for the small plaque on the bottom. I love how it turned out. I hope my Aunt loves it just as much as I do.
Thursday, December 11, 2008
Summertime on Harth Farm
This summer we spent a week at my Aunt's farm in Minnesota. I was enthralled with farm life and took tons of pictures of everything around me. I decided to make her a picture collage of my favorite photos from her farm. Brooke gave the pictures a vintage look and feel and Bridget gave me the idea for the small plaque on the bottom. I love how it turned out. I hope my Aunt loves it just as much as I do.
Wednesday, December 10, 2008
Recycled Crayons
Crafty Dasies has a great tutorial on making recycled crayons. I already had a box of crayons that had an unfortunate accident,
and even more crayons that are the the larger (aka baby) size that my daughter won't use anymore. Perfect for making recycled crayons!
1. Using an exacto knife (or a 3 year old), take the wrapping off all of your crayons and break them into 1/2" to 1" pieces.
2. Option 1: Put "like color" crayon pieces into a mini muffin tin and bake at 275 for 6-8 minutes.
3. Option 2: Put "like color" crayon pieces into a microwave safe cup/mug and heat for 30 seconds to 2 minutes, depending on how many crayon pieces you have in the mug. When it's melted, pour into a cute shaped ice cube tray or candy mold. I found my snowman and santa ones at Deseret Industries for .50 each. Don't use ones that you love or paid a lot of money for, because mine broke when I pulled it out of the freezer.
Put them in a gift tin with some tissue paper and you're ready to go!
Aren't these snowmen so cute!!! I love them!!
For the snowmen, I found a tin that fit the 8 colors perfectly and had some room to spare for a few sheets of blank paper (rolled up and tied) for coloring. This one is for my nephew :)
Here's just a couple of "crazy" santas we did with the extra melted crayons.
Cleanup was pretty easy too. We just soaked our mugs that we melted the crayons in, for about 30 minutes, in hot soapy water. The crayons cleaned right off the mugs!
Monday, December 8, 2008
Quiet Book for Church
When my (very active) sister was little, my mom made her this cute quiet book to keep her busy at church. Now my sister is all grown up and has a (very active) son of her own. I decided to refurbish her quite book and give it to her son. The plastic bags were ripped and falling apart, so I ripped out the stitches, and replace the bags. Then I put some fun activities and crayons for her son to do. It's so nice to still have this great book that my mom made. Hopefully it will be in the family for quite a while!
Here's the double stitching to hold the bags in place.
2 pieces of fabric 8 1/2 x 20
Optional: Sew ribbon, ric rac or lace to the front of the top piece.
Pin ribbon to inside of the fabric on the 8" ends about 4" up. One ribbon on each side, baste if needed. Place fabrics wrong sides together, with batting on the outside of one piece. Sew (seam allowances 1/4") all sides together, leaving about 3" on a 20" side for turning. Clip corners and turn right side out. Press and either top stitch edges or slipstich 3" opening closed. Fold and press bag so that it measures 9.75 x 8. Slip 5-7 bags into folded bag and double stitch on folded end, about 1/2" in. Fill with crayons, paper, snacks, etc.
Saturday, December 6, 2008
Emergency Pocket Kit
Cost for unfilled kit - $1.24 each + tax
1 Wal-Mart Potholder (2 pack for $1.50) - .75
8 Snack Sized Ziploc Bags (100 for $2.68) - .24 (.03 each)
1 yard of ¼” or 3/8” Ribbon - .25
This is a cute little emergency kit that I saw in an Etsy shop. It was such a cute and simple idea that I thought I'd make a few for Christmas this year. It was easy, except that the Ziploc bags are really slippery!
1. Take tag off potholder.
2. Tape 4 bags together, and then another 4 bags together. This picture is just 1 set of 4 bags. You will need 2 different sets.
3. Overlap ends of bags together about 1/4" to 1/2", alternating sides.
4. Pin bags down to potholder (see photo). The pins work just fine if you just stick them straight down into the potholder. Just like you would use a thumbtack. Be careful, pins do leave holes!!
5. Sew Ziplocs onto potholder down the center of the Ziploc.
6. Attach 18” of ribbon (folded in half) to one side of potholder.
7. Optional: Sew ribbon down center of Ziplocs to cover stitching. Here are 2 examples. One with the optional ribbon and one without.
8. Fill with items of your choice (Band-Aids, wet wipes, medicine, Kleenex, safety pins, cough drops, toilet seat cover, etc)
Thursday, December 4, 2008
Santa Bag
This is a cute Christmas bag that I made about 10 years ago when my boys were little. This is another bag that I received for free from one of my Dad's medical conferences. It works perfectly as a Christmas bag since the top is green. I love the drawstring handles that makes it look like a peddlers sack.
Here is the up close detailing. I put very lightweight batting under the applique and then zig zag stitched around the edges. I didn't think it looked "finished" enough, so I stitched on some of the black outline, so that the design would "pop" more.
Here's the inside of the bag. Can you see the faint outline of the medical logo/design that I covered up?
Sunday, November 30, 2008
Finished Dress!
I've finally finished a dress for Hannah! I actually started this over a year ago, and just finished it yesterday. It's a good thing the size 3 runs large, otherwise it never would have fit her :) Hannah says she loves her beautiful dress. If that's not motivation to make more clothes for her I don't know what is!
I used Butterick 3350 for the dress
Simplicity 8953 for the sash,
and Pink Fig "The Lily Top" for the kerchief.
Tuesday, October 28, 2008
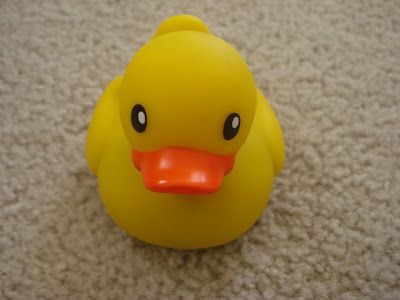
Rubber Duckie Door Stop
I bought some art by Ken Greenhalgh and decided to hang them in the bathroom. Of course I needed a Rubber Ducky Door Stop to match.
Step 1: Buy generic rubber duck from Walmart and cut a half circle in the bottom.
Step 2: Stuff with river rocks.
Step 3: Hot glue the bottom closed. It doesn't have to look pretty, since no one will see the bottom, right?
Wednesday, October 15, 2008
Halloween Trick or Treat Bags
I made these bags about 10 years ago when the boys were little. The bags were from one of my Dad's medical conferences that he received for free, so under the cute Halloween picture is a medical logo or slogan :)
I don't remember what fabric company this is from, but I still think it's so cute! Here is the back of each bag.
Here is the up close detailing. I put very lightweight batting under the applique and then zig zag stitched around the edges. I didn't think it looked "finished" enough, so I did a straight stitched on some of the black outline so that the design would "pop" more.
Tuesday, September 16, 2008
Ribbon Hair Clips
I found this cute tutorial on The Long Thread's "Make it Monday" segment. I love this idea, but couldn't find ribbon as cute as hers. I do like how it turned out and think it looks great in Hannah's hair.
Friday, September 12, 2008
The Very Hungry Caterpillar Bag
I love what Kira did with her Hungry Caterpillar fabric that I had to make my own bags! I bought the bags at Joanns and the fabric at Quiltique. I used Heat n Bond Ultra Hold so I wouldn't have to sew around the detailed edges.
I'm planning to put "The Very Hungry Caterpillar" book in each bag and give them as baby shower gifts. Now I just need to find a Hungry Caterpillar card, to complete the gift!
Tuesday, September 9, 2008
Quiet Bag (for church)
Kira saw the cutest quiet bag idea on Just Trying to Remember's blog. I asked Hannah if she wanted her whole name on the bag or just an "H", & she picked her initial. Then I printed out "H"s in different fonts for Hannah to pick from. She picked D.J. Inkers "Love" Font for the H, which was my 1st choice too. I printed out the H in a 500 font size, and the little heart is from D.J. Inkers "Heart Art" in about a 200 font size. I used Heat n Bond to hold it to the bag (from Joann's), so no sewing! It's really simple, but I love the look of it.
**Updated 10/2008 ** Since I used Heat n Bond lite (instead of "ultrahold") to set the "H" & heart, it did start to come off of the bag. I sewed a straight stich close to the edge of both and it looks great!!
Here's what's inside:
- Pencil pouches (.97 each) from Walmart to hold crayons and paper
- Coloring Book
- Shapes matching game from Finch Family Games
- 3 Ring binder to hold pouches, coloring book and matching game.
- Snacks & water (not pictured)
Friday, July 18, 2008
The Little Artist Drawing Case
I made two "Little Artist Drawing Cases". One for Hannah and one for my nephew Max. The "Drawing Case" is a little fabric book that opens up to reveal crayons and/or a pencil and drawing paper. The pattern is very easy to follow and it arrived VERY quickly!
I love the fabric. I wanted fabric that Hannah would be able to use for a long time, so no Dora or Diego this time!
Flap covers crayons so they don't fall out when carrying the case around.
Here is Max's case. Very boyish :)